Git part 2
20 October 2020
Find the video accompanyment for these notes here
Table of Contents
- Git remotes
- GitHub example
- Collaboration best practices and techniques
- Resolving merges
- Pull requests
- Exercises
Git remotes
Having a repository for storing your work is only half the story; you may want to back up your work, or share it with others. For this purpose Git has “remotes”. Any Git repository can be a remote or have remotes it connects to (or both at the same time). Git’s remote system is very flexible.
What is a remote
A remote is simply another git repository. Because git is a distributed version control system, each git repository is a full, independent copy that is able to send and recieve commits to and from others. These may be other repositories on the same system, or on another computer on the local network, or (most commonly) on a server accessed over the internet.
A local repository can “push” commits to a remote, or “fetch” and “pull” commits from a remote.
There are many methodologies for structuring remotes, but the most common is to have each developer in a team have a local repository on their device and one bare remote repository for them to collate their work on.
Terminology: Git doesn’t care about the structure of remotes, but by convention we say the flow of changes from development machines to the remote repository is called “upstream”. Then the flow of changes from the shared remote back to the development machine is called “downstream”. In this way we can say a development machine is downstream of the remote.
How interacting with a remote works
When you set up a remote for your local repository you give it a name, as the repository can have multiple remotes. The most common name is origin. The state of the remote is then represented on remote tracking branches. This is a one-way relationship where each local branch can be associated with, or “track”, a remote branch, which is the designated branch for it to push and pull commits to and from. In almost all cases, the local branch and the remote branch will have the same name.
To get a local repository with a remote you must either clone an existing remote
repository or add a remote to an existing local repository. To clone a remote
repository use the command git clone <remote repo URL> [name]. This will make
a new folder called [name] containing the copied repository. To add a remote
to an existing local repository use the command
git remote add <remote name> <remote URL>. These will be expanded upon later, with the example of GitHub.
To retrieve commits from a remote to your local repository you use git fetch
[remote_name]. The remote can be omitted if it’s the only one configured in the
local repository. This command will retrieve the objects from the remote
repository and represent the commits on remote tracking branches.
Remote tracking branches are functionally the same as remote branches except
they are named like remotes/<remote name>/<remote branch name>, and they are
automatically generated on a fetch to represent the state of the branches on the
remote. To bring changes into your local repository branches you merge the remote
tracking branches into your local branches.
Note: You should never work directly on the remote tracking branches - it causes a lot of headaches.
To push your work to a remote, you use the command git push [remote] which
will push the current branch to the configured remote branch.
However, if you’ve made a new branch in your local Git repository, Git will not
know which branch on the remote to add your changes into, or it may need to make
a new one. To correlate local branches with branches on remotes Git uses
something called a refspec. These are configurations within your Git
repository which tells Git what remote branch you wish for the local branch to
update and pull from. The most common way to add a refspec is to add the -u
flag to your push command. This will add a refspec for your checked out local
branch to a remote branch of the same name. The whole command is then
git push -u <repository> <branch>.
After refspecs have been configured you can use the git pull [remote] command
which will fetch all commits from the remote, add them to the remote tracking
branches, then merge them into the local branches specified in the refspecs.
GitHub example
GitHub is the most popular host for remotes. GitHub hosts remote Git repositories and manages access to them. With GitHub you can control which users can pull your repository and which can push changes to it.
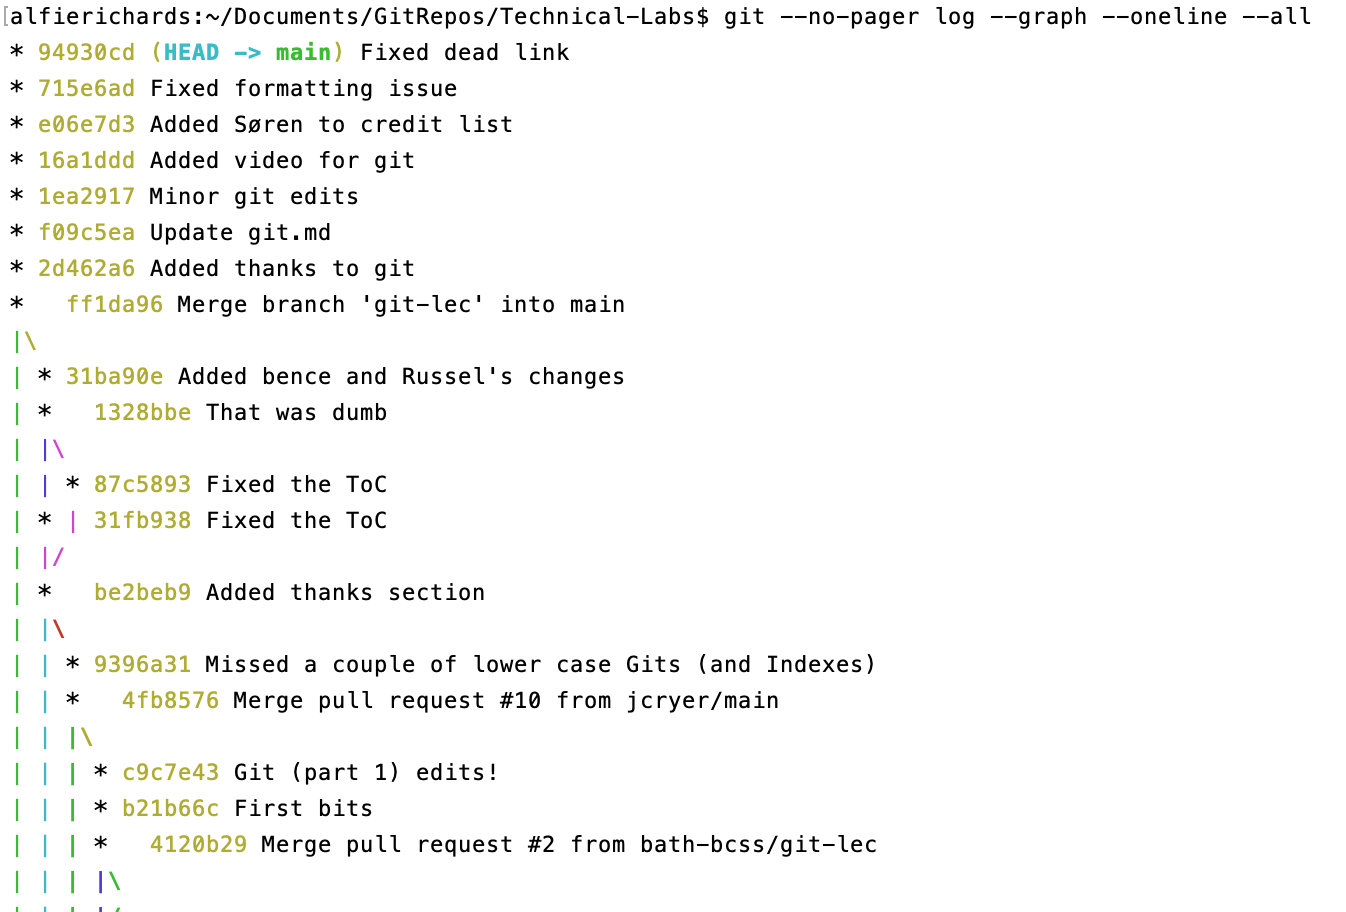
For example, let’s use a local Technical Labs repository. Here you can see it with a long history.
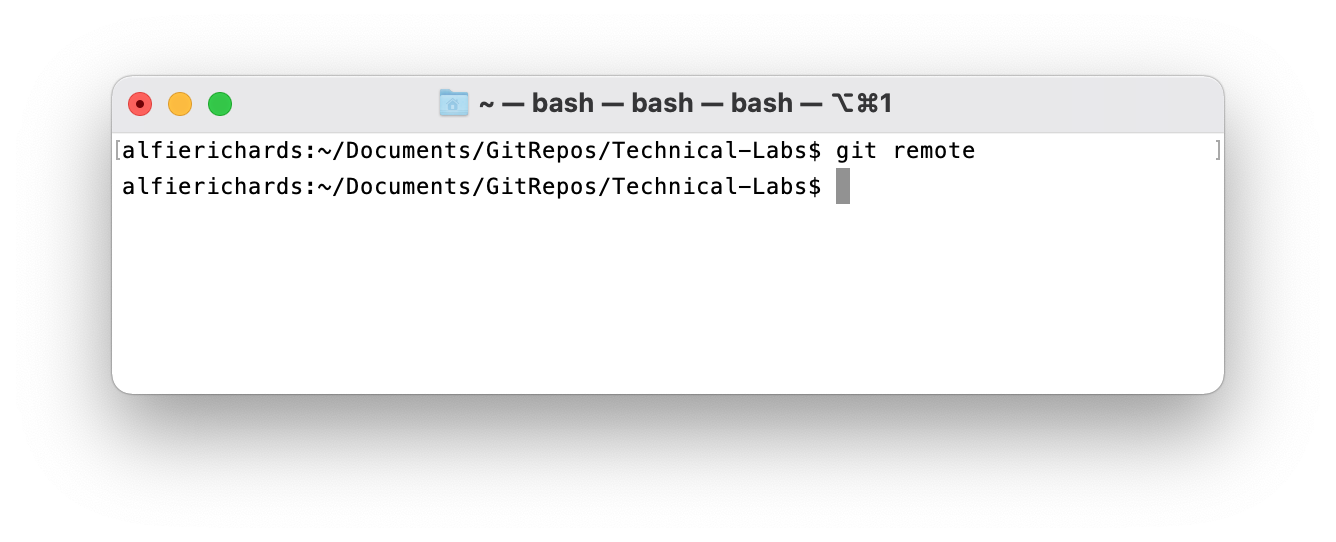
The command git remote lists the current remotes. Here you can see there are
no current remotes (I removed them for this example).
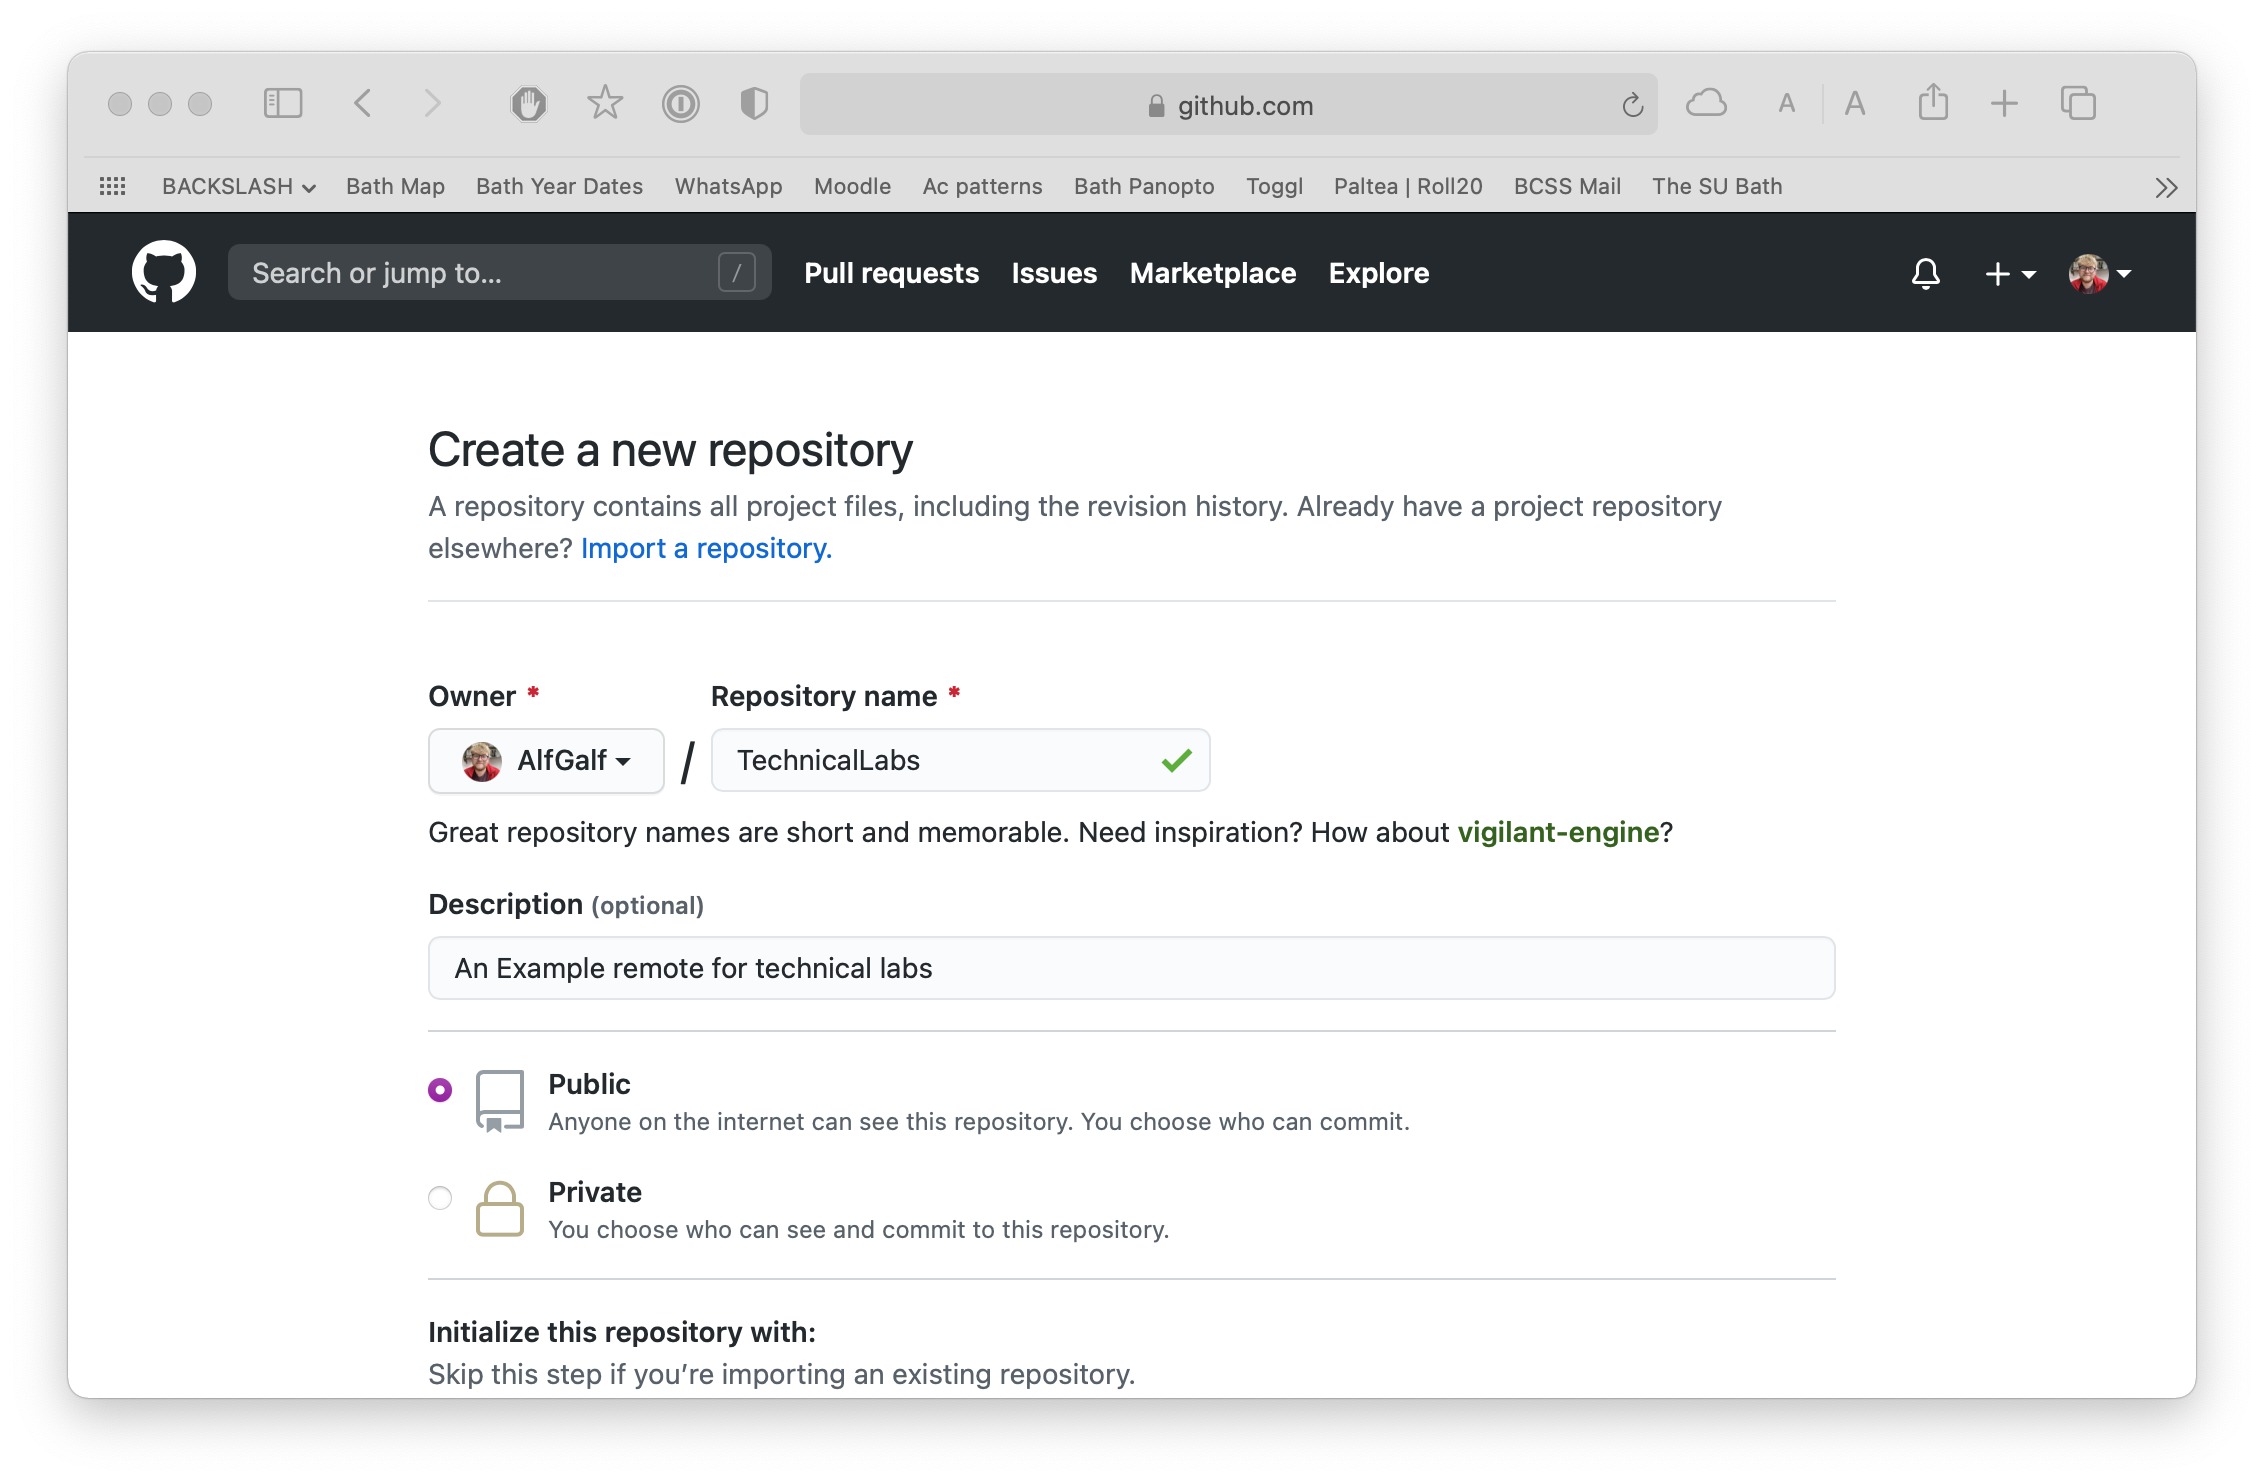
We then need to set up a repository on GitHub. To do this first set up an account if you don’t already have one. Then you need to click the + button at the top right, and then “New Repository” in the drop down.
You will be presented with some options for setting up a new repository. Here I’m going to enter details for a new GitHub repository for Technical Labs.
Click confirm and then you will be presented with the following screen showing your new empty repository.
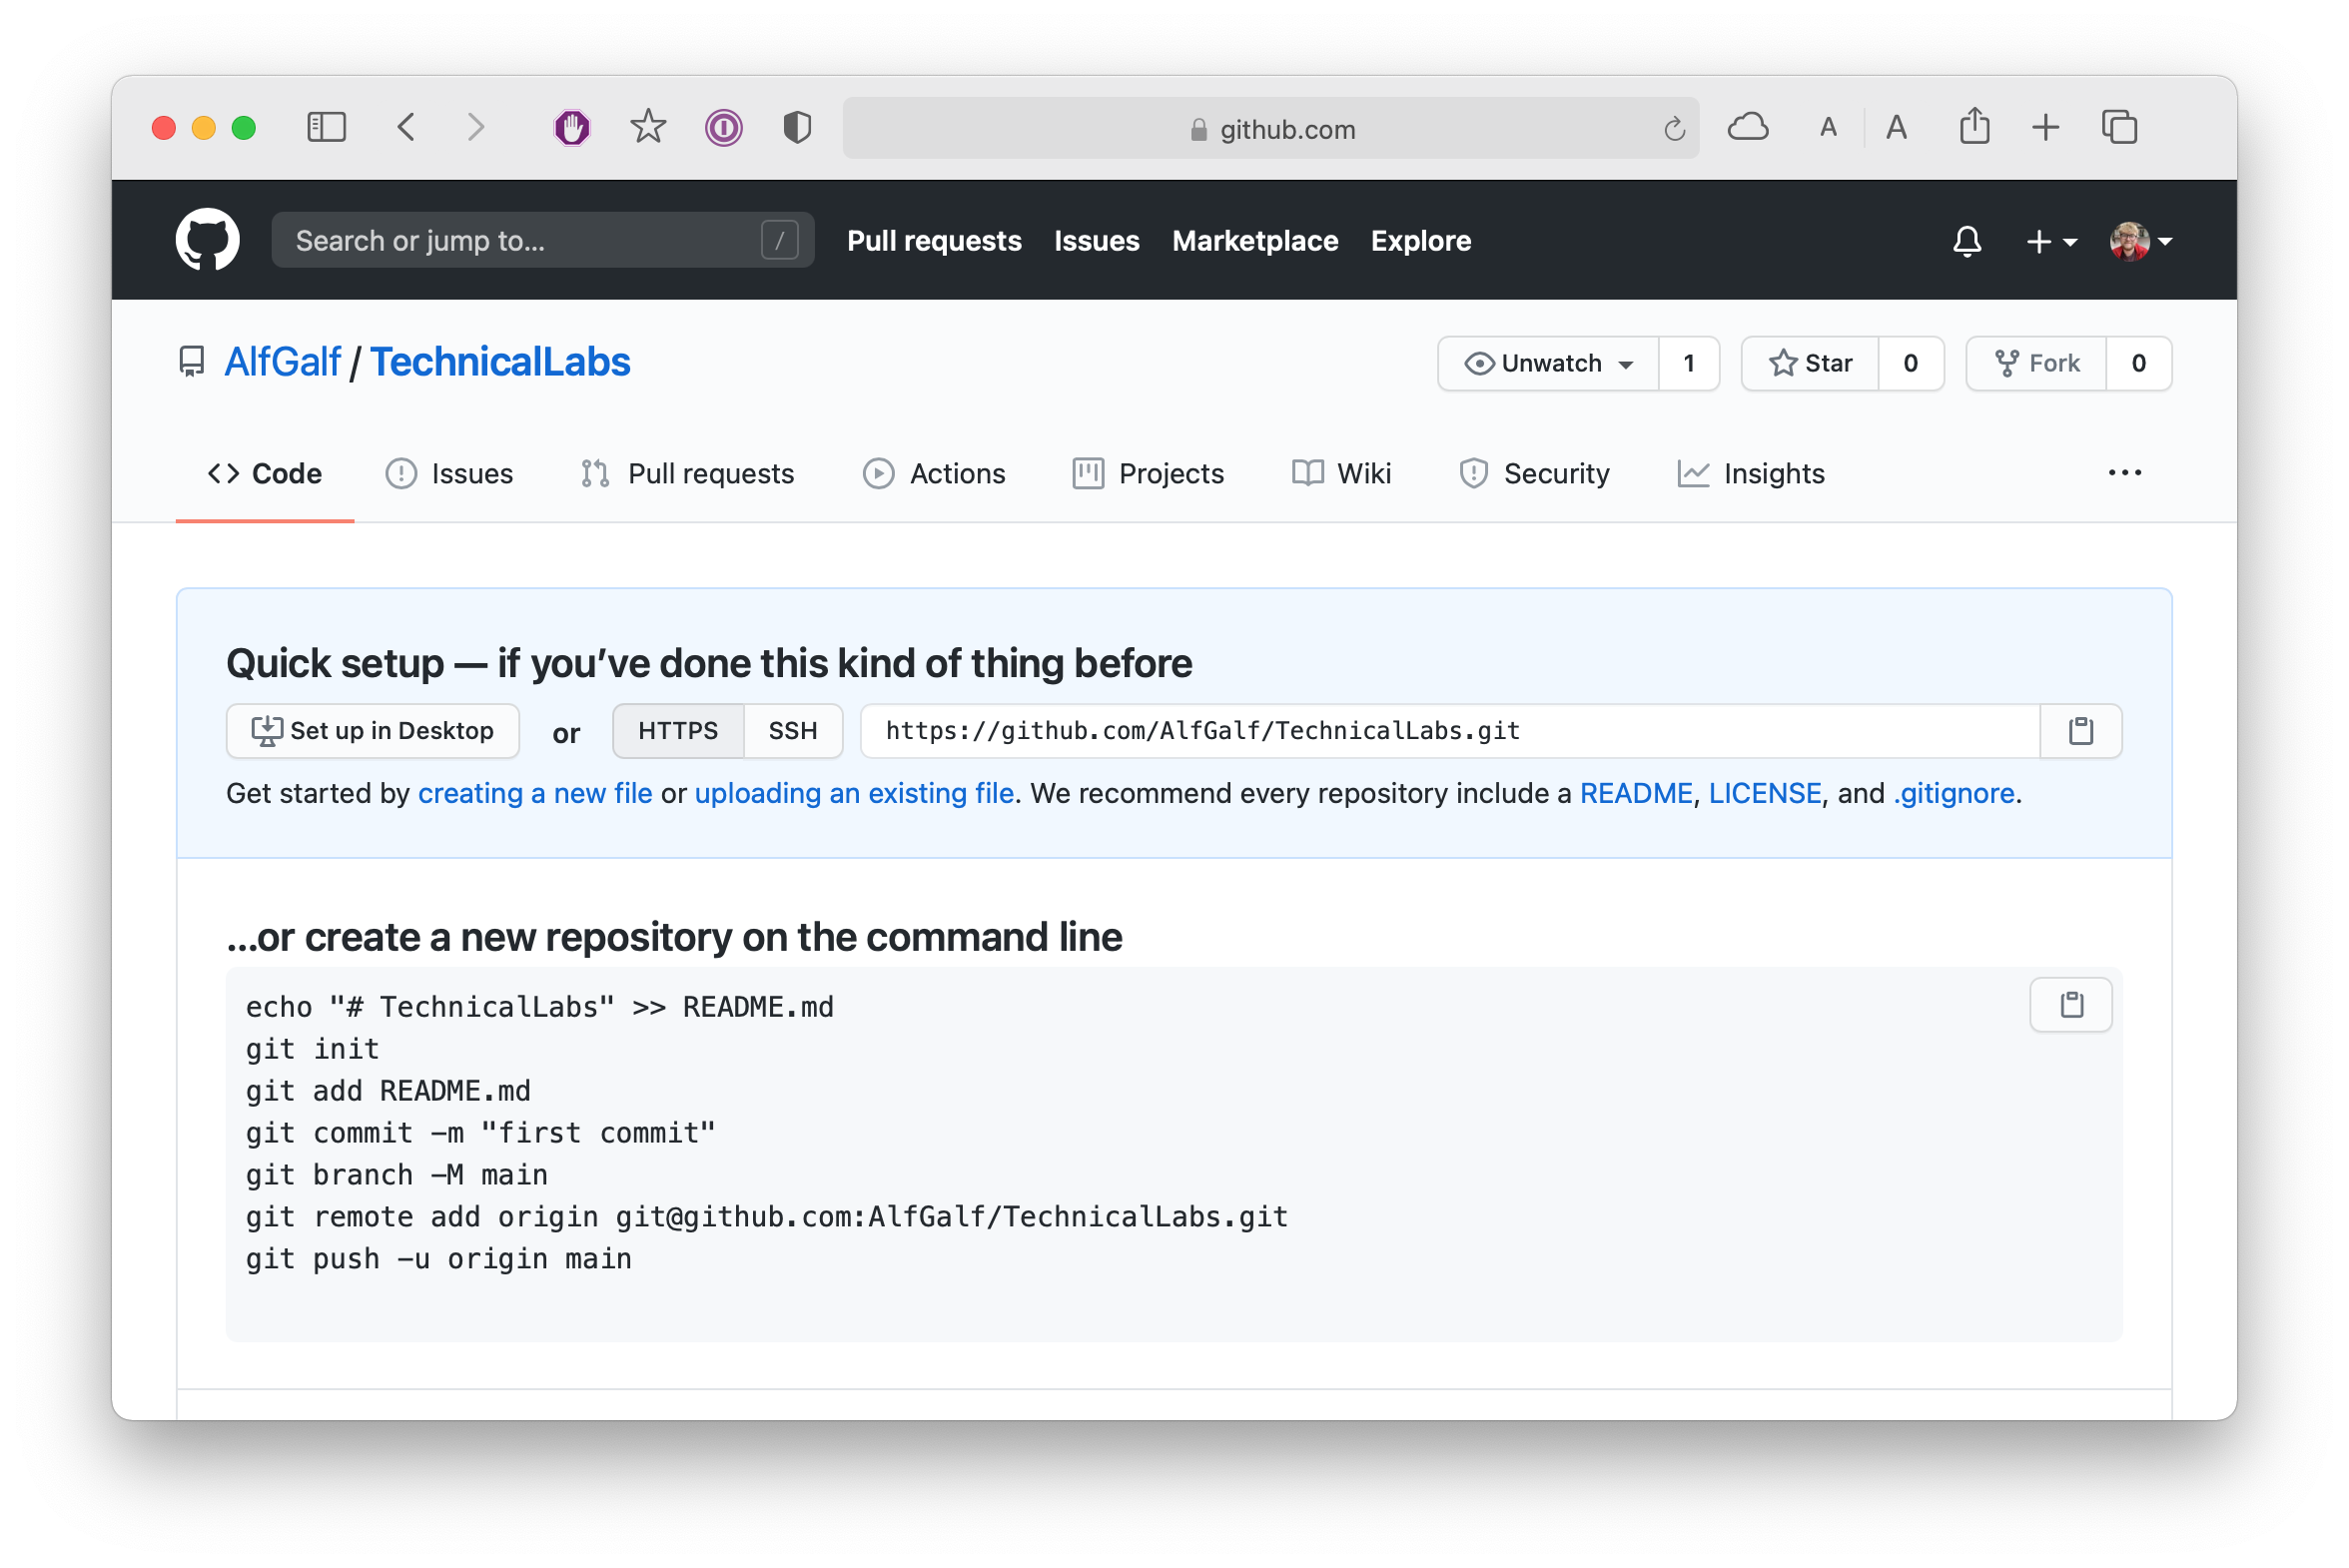
The address at the top is the address for the remote that has just been set up that GitHub is now hosting. We can now add the remote to the local repo.
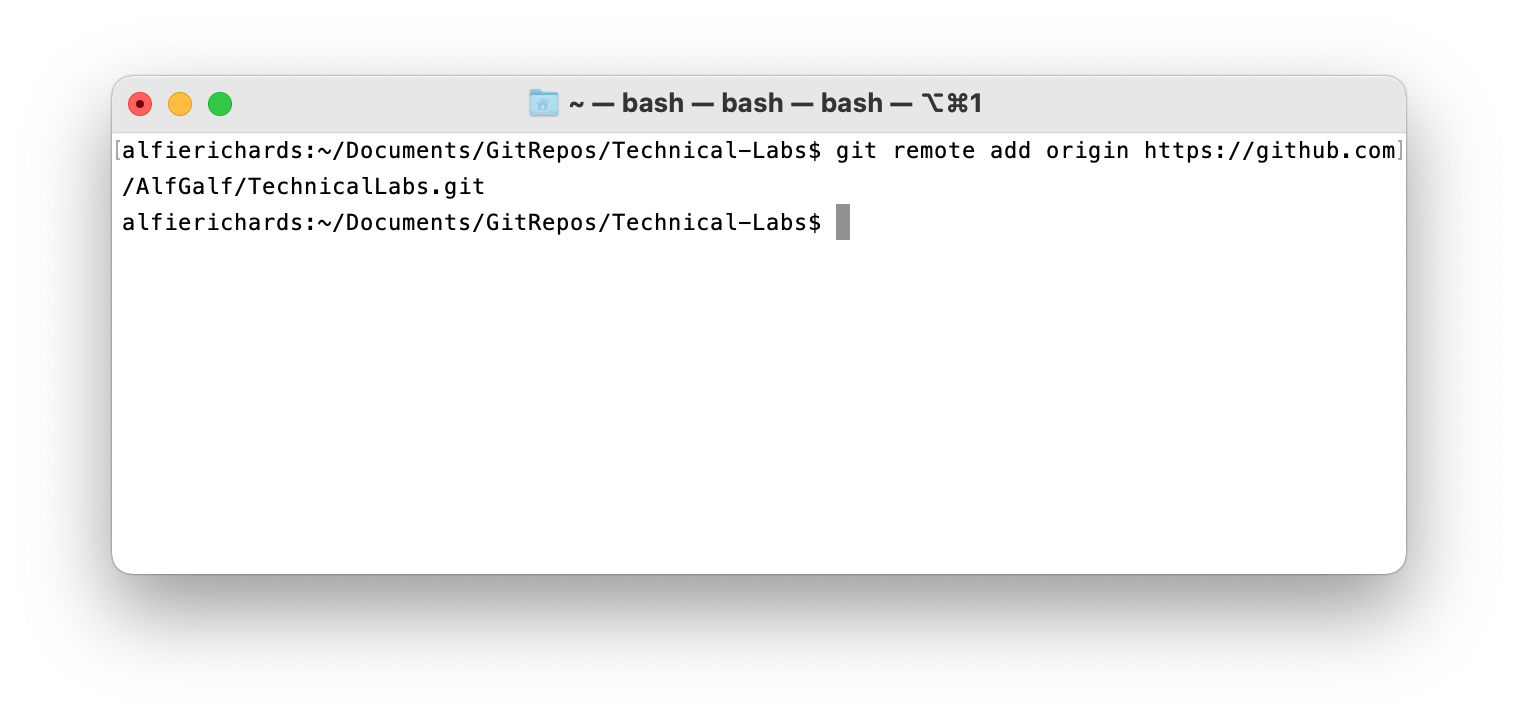
Now the Git remote is added. But the remote is empty so we need to push to the remote, which means sending all the commits in our history to the remote, which, thankfully, Git can do easily and efficiently.
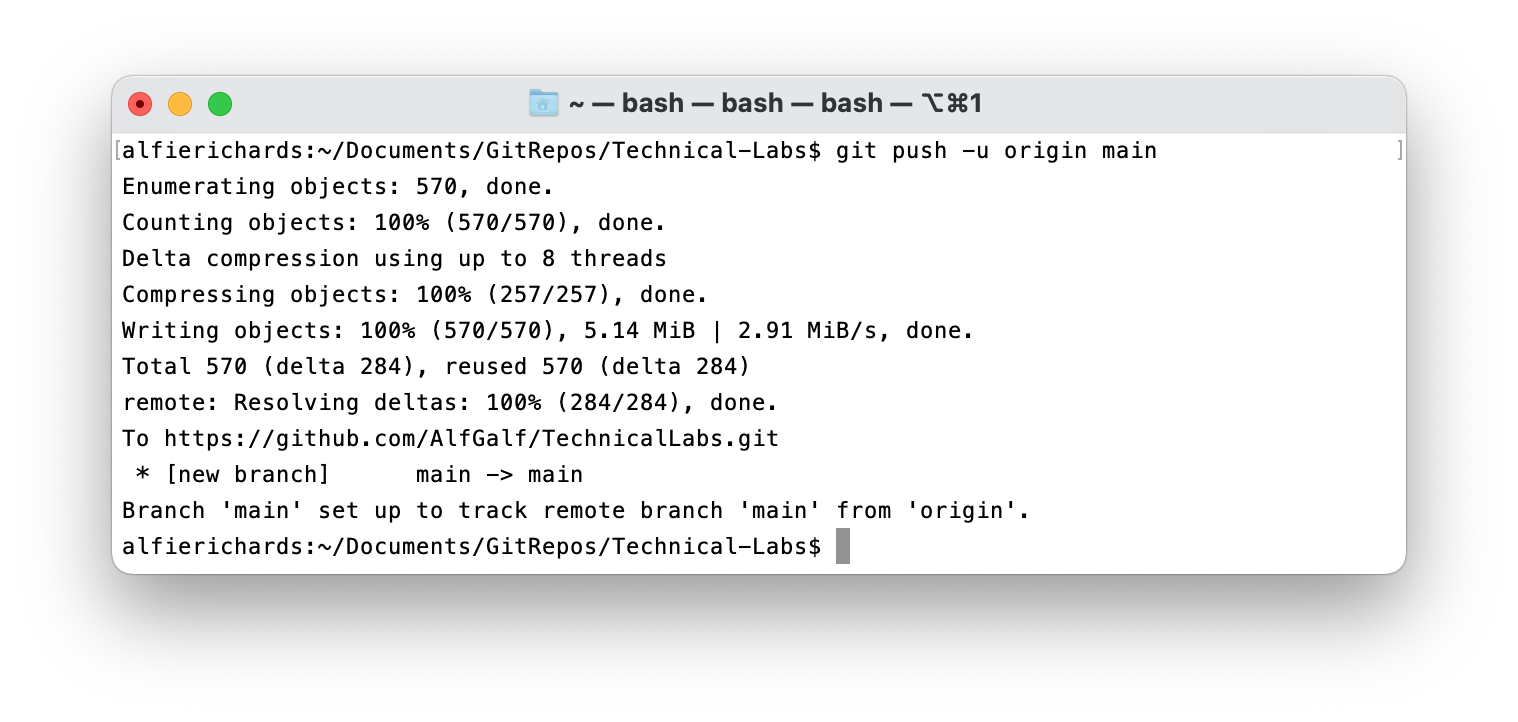
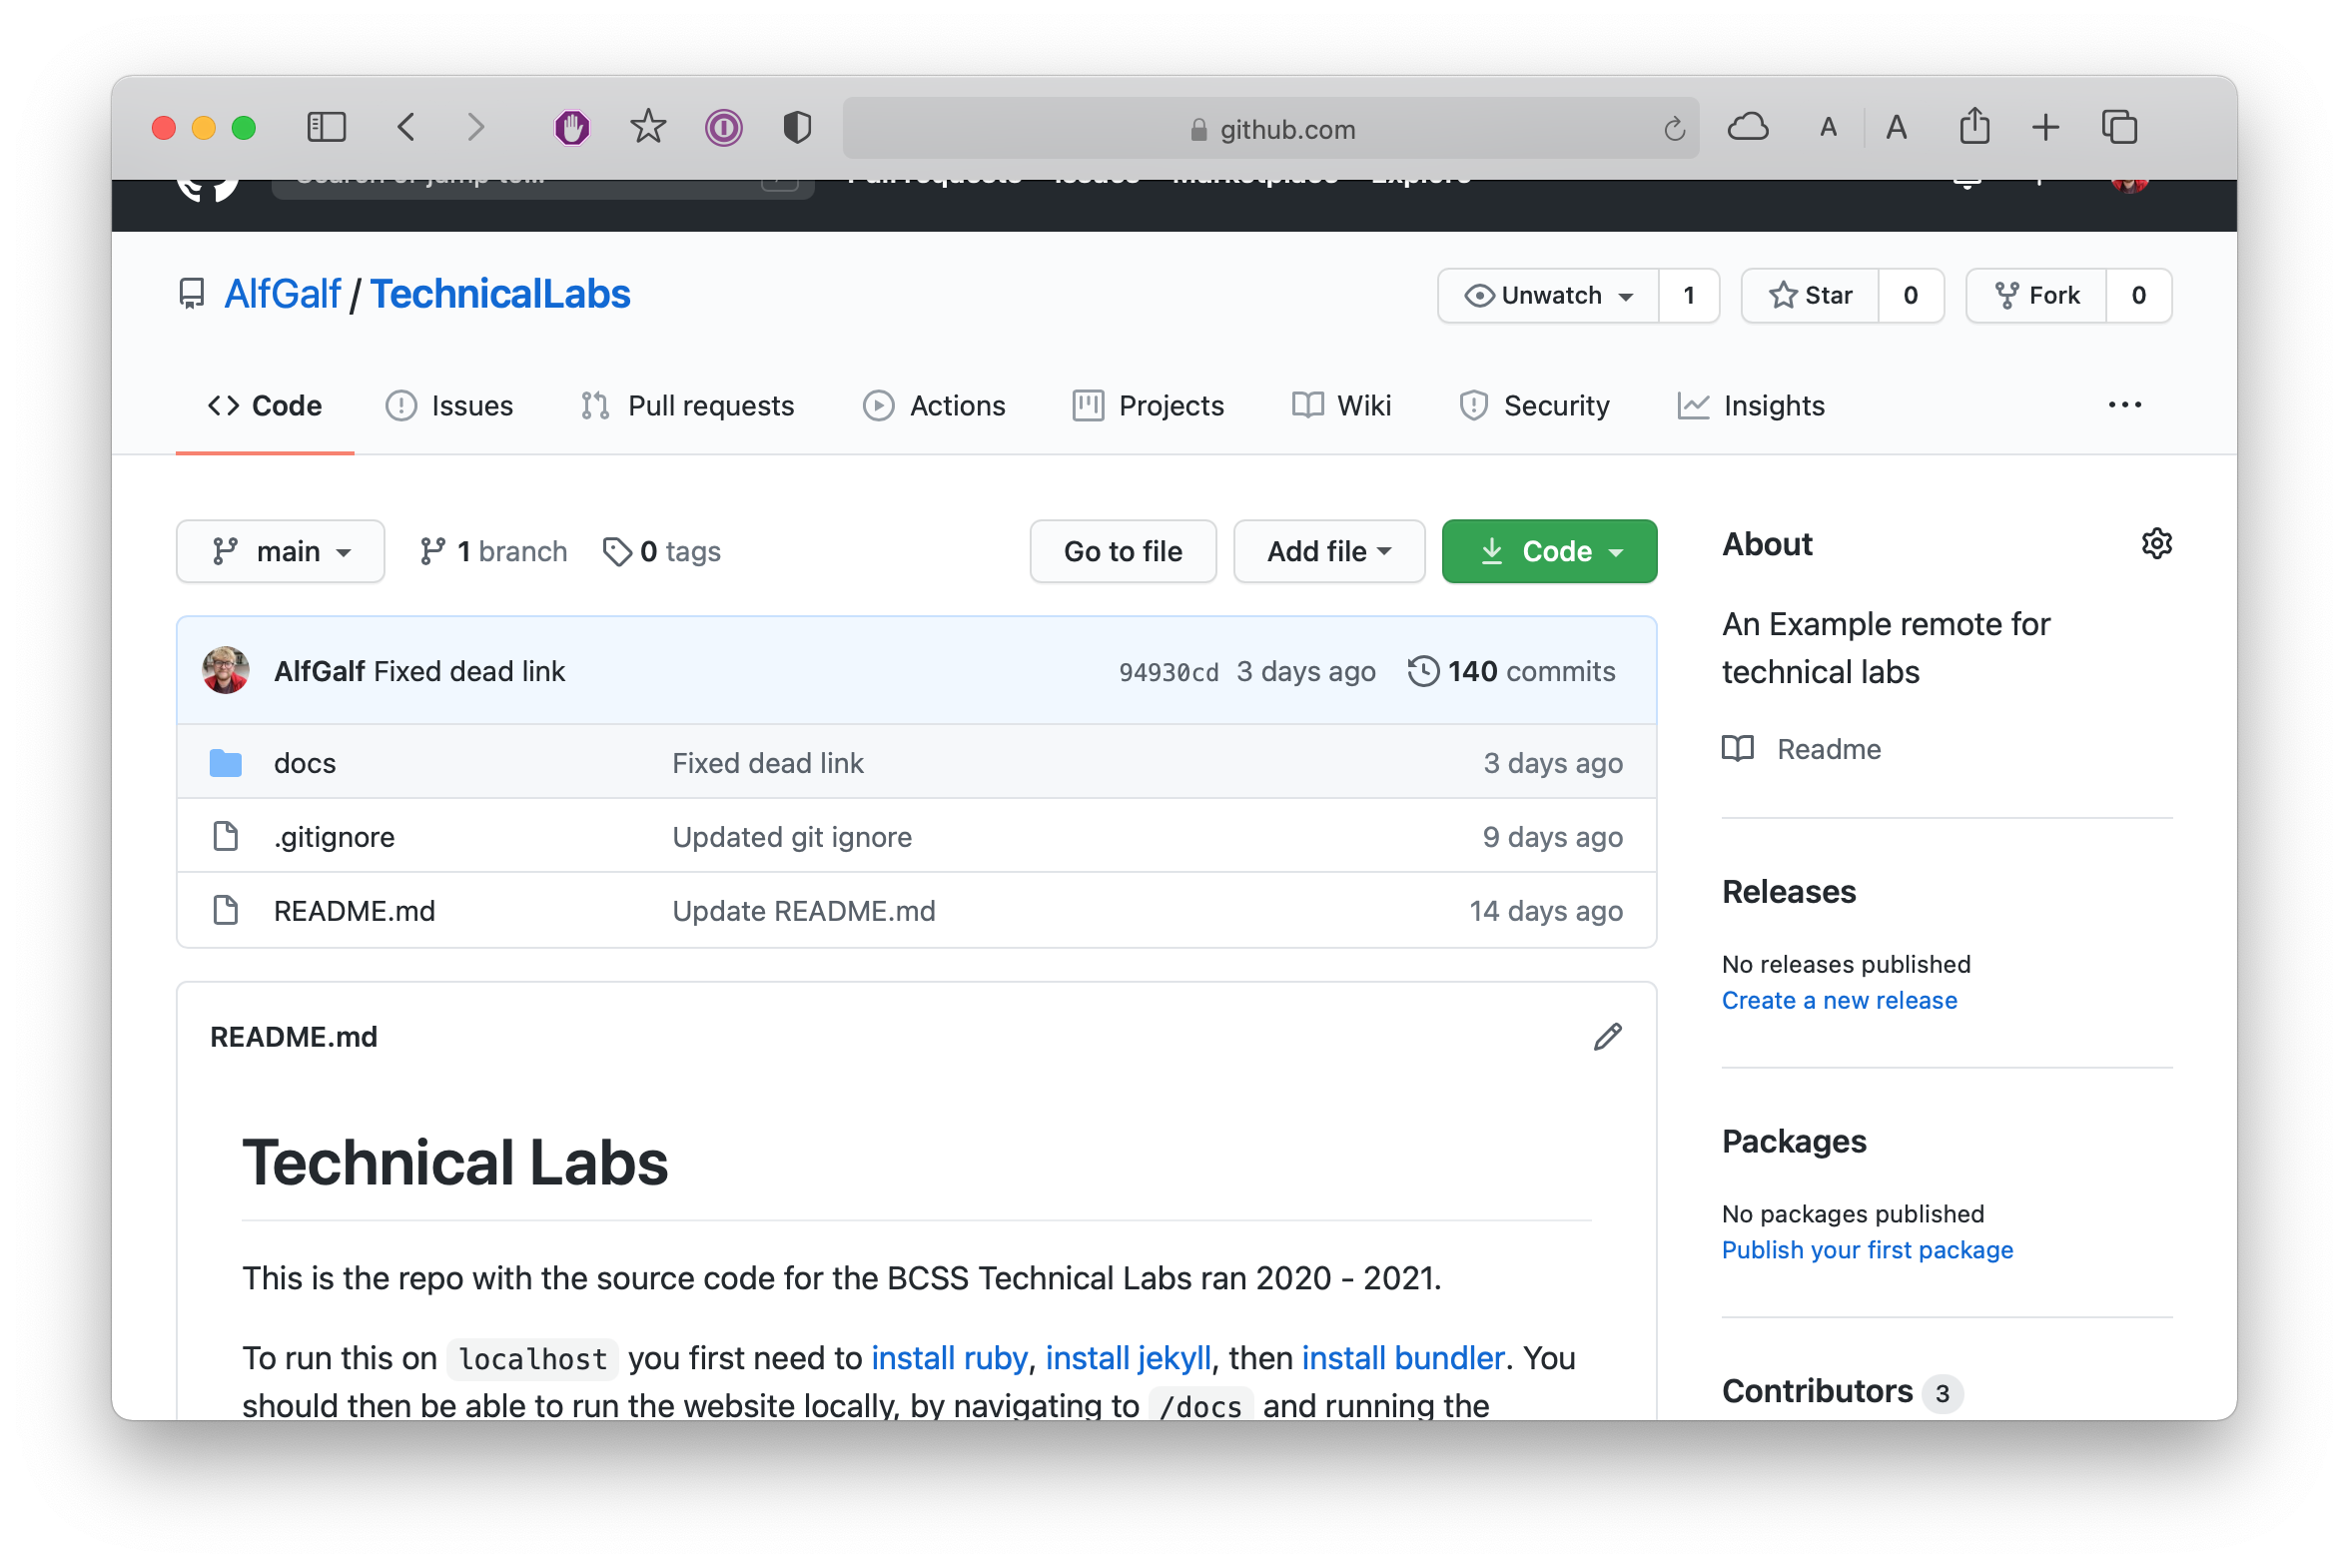
If we now look at the remote on GitHub we will now see the files of our most recent commit on the main branch, and we can go through and see all of the commits making up our history.
If we now add some new changes to our local repository we can push the new commit.
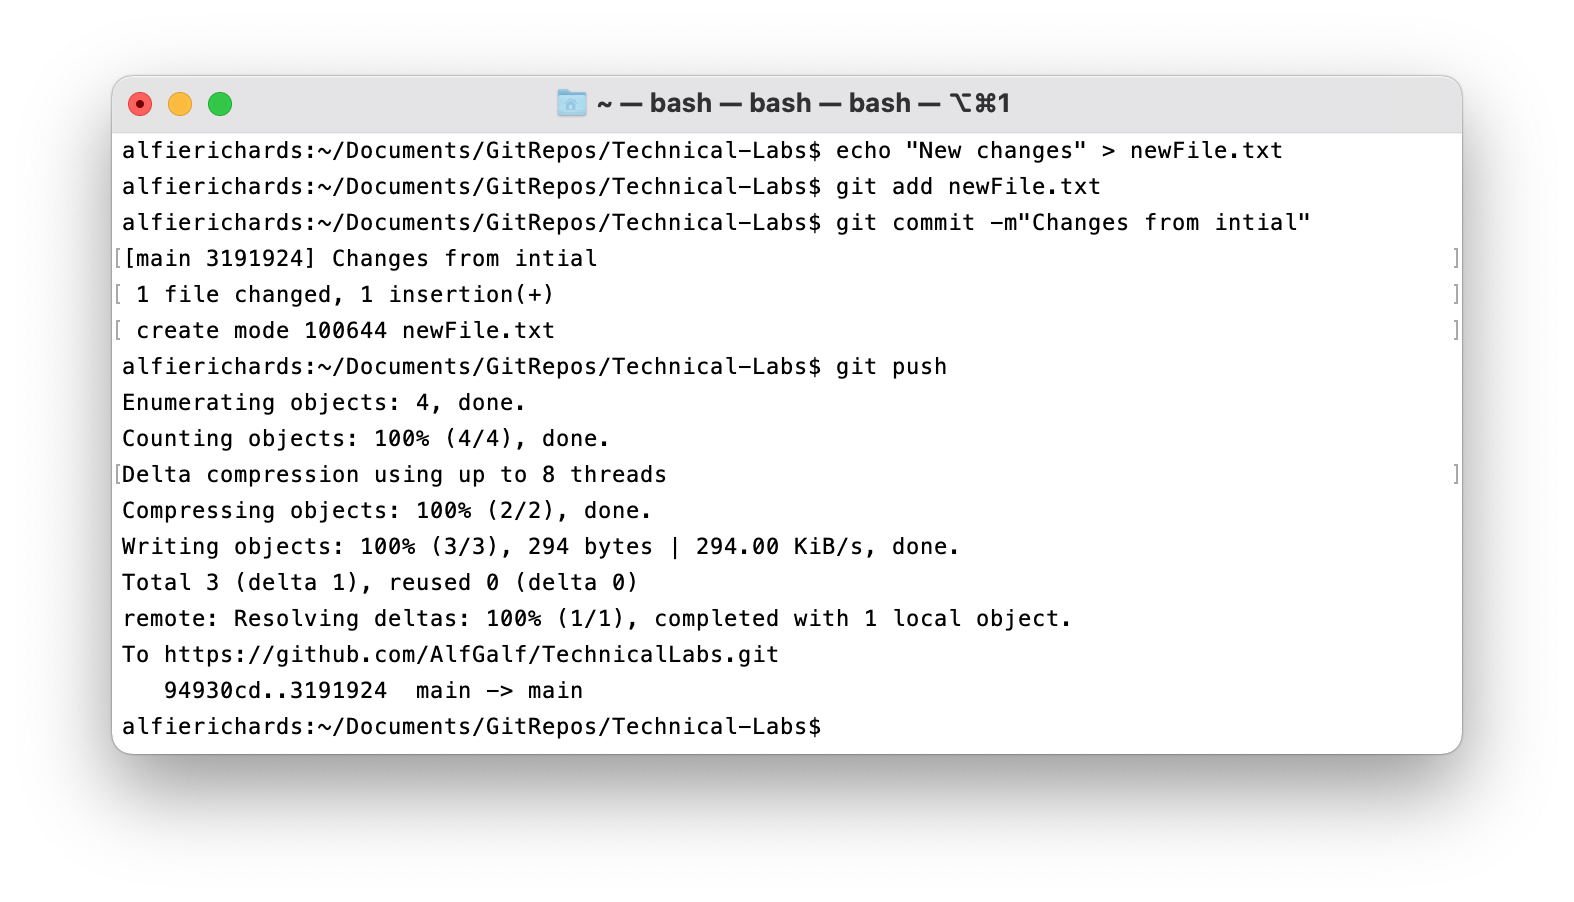
And if we look at GitHub you will see the new file.
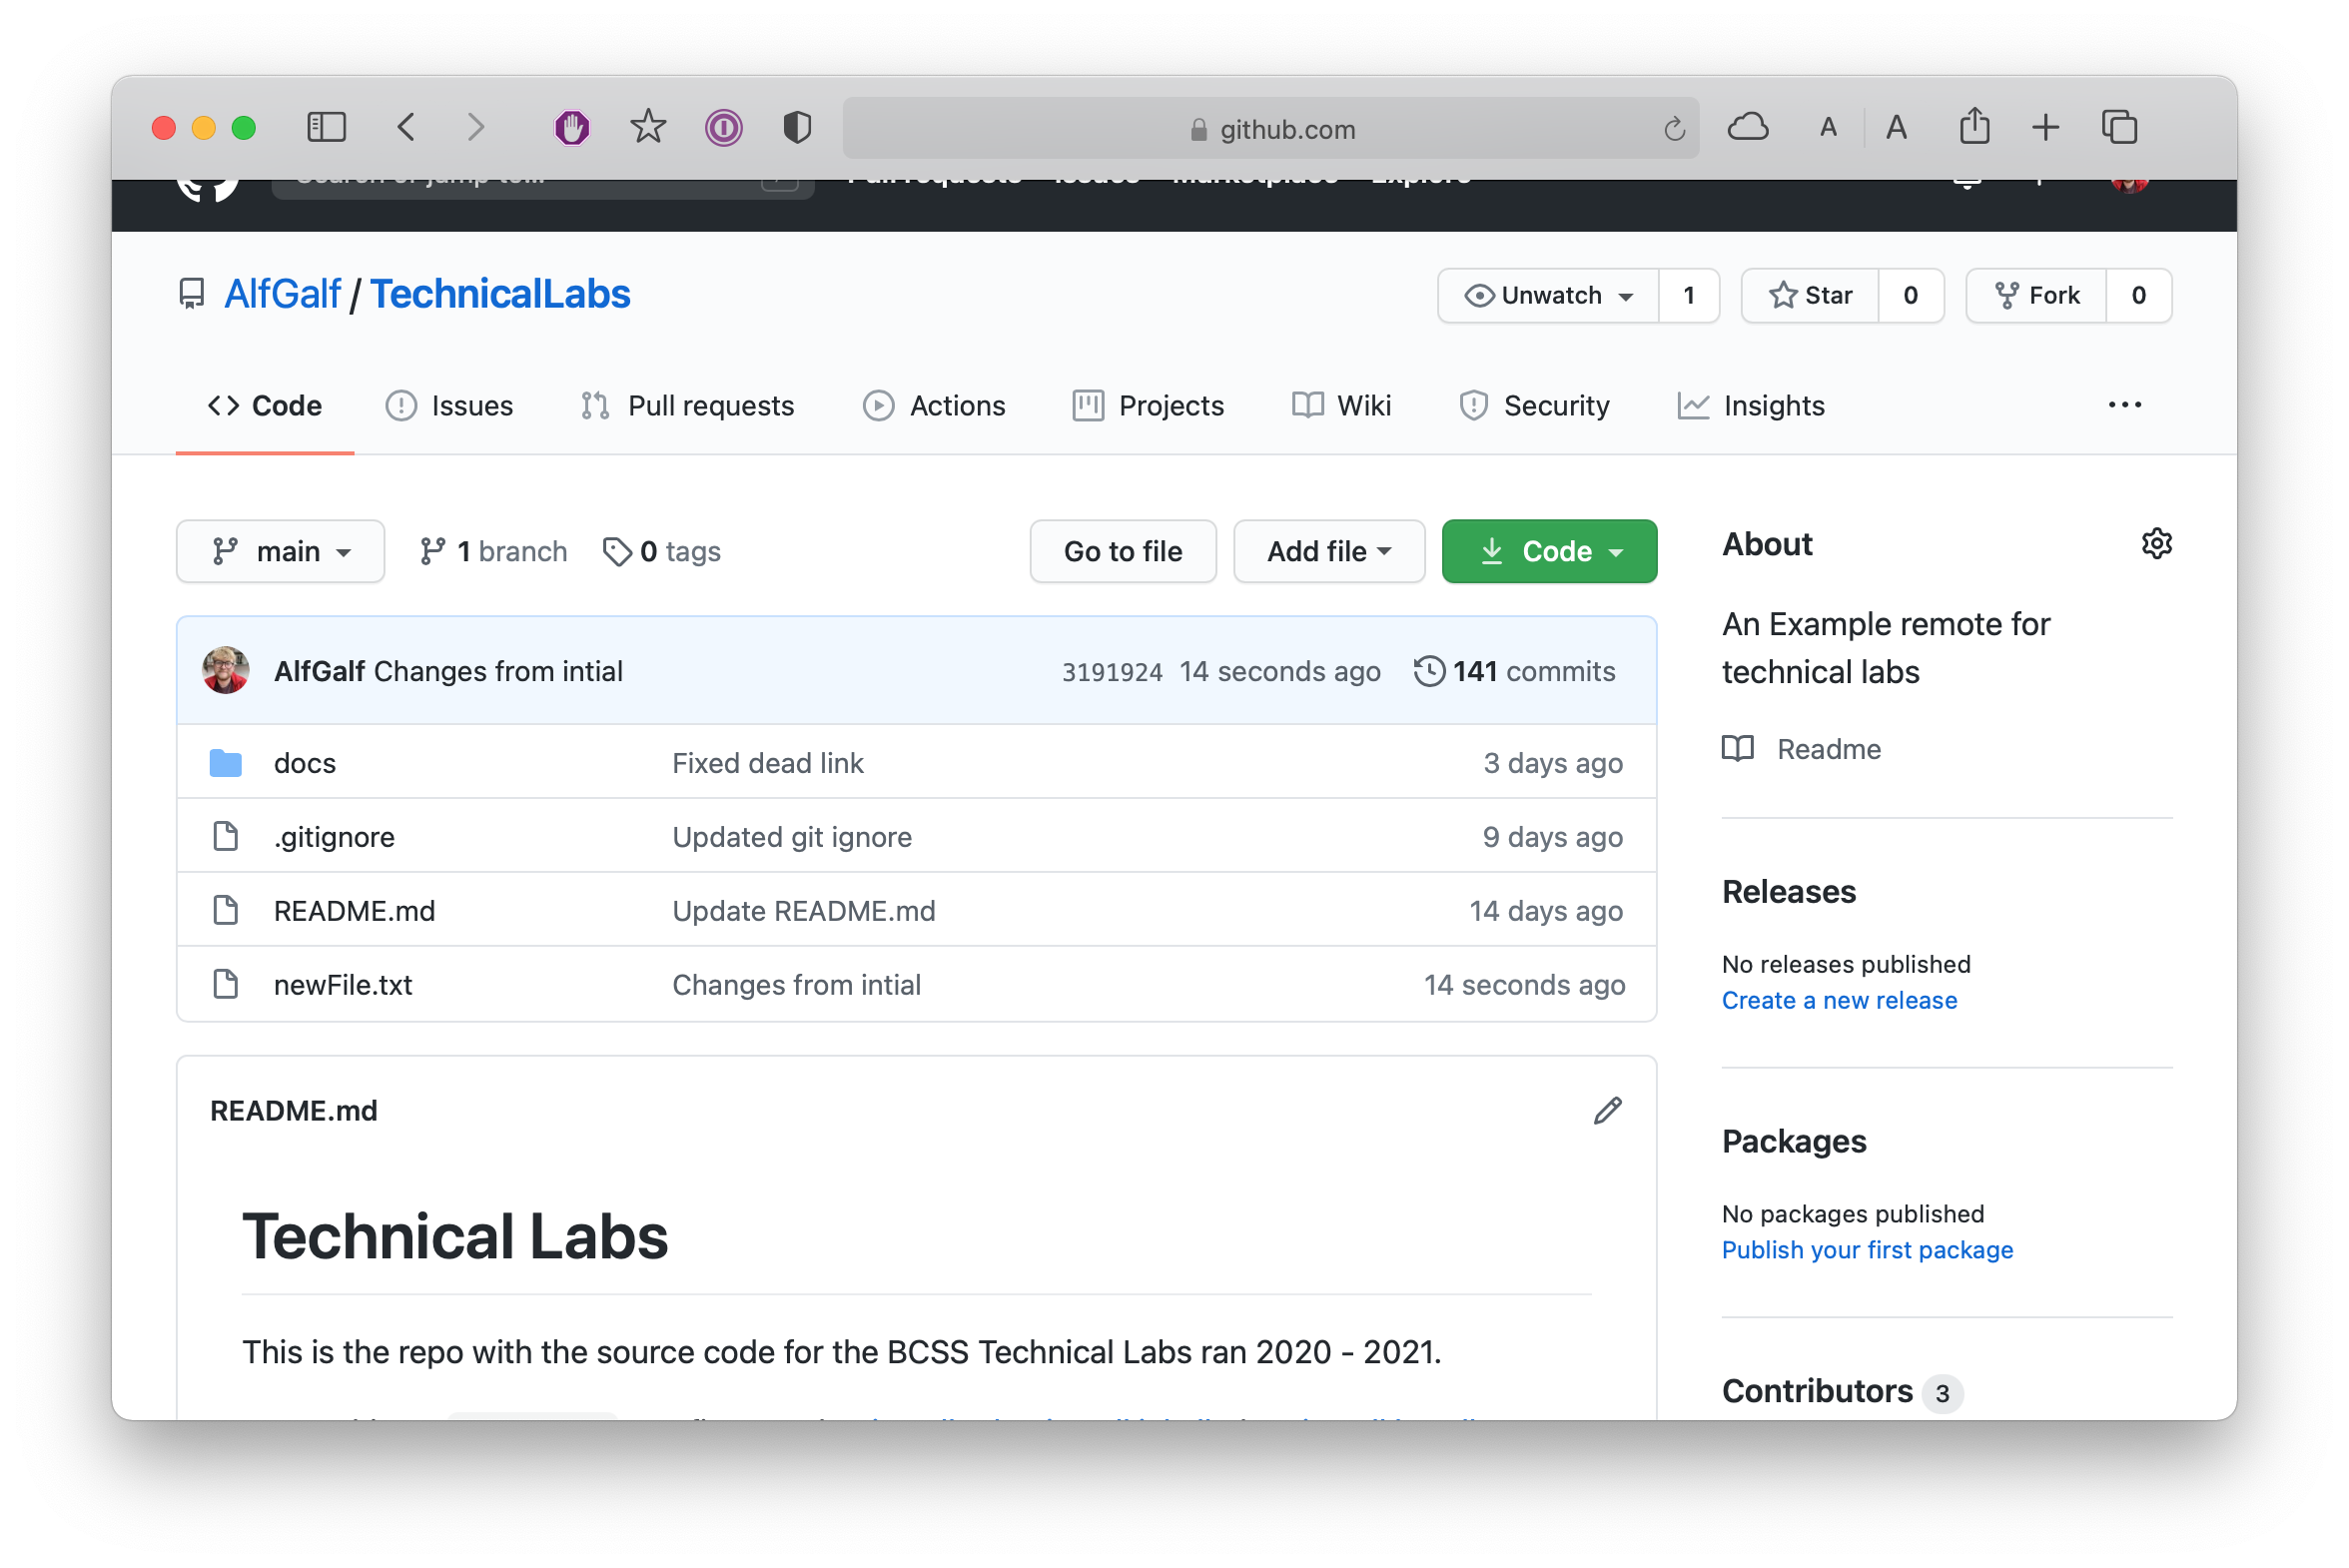
Now imagine we’re working on this project with others. They may have have cloned the repository and submitted changes of their own. Alternatively you may have made changes from a different machine. Here, I have just added changes from another clone I made.
We can then use git fetch to pull the changes into the remote tracking
branches on our local repo.
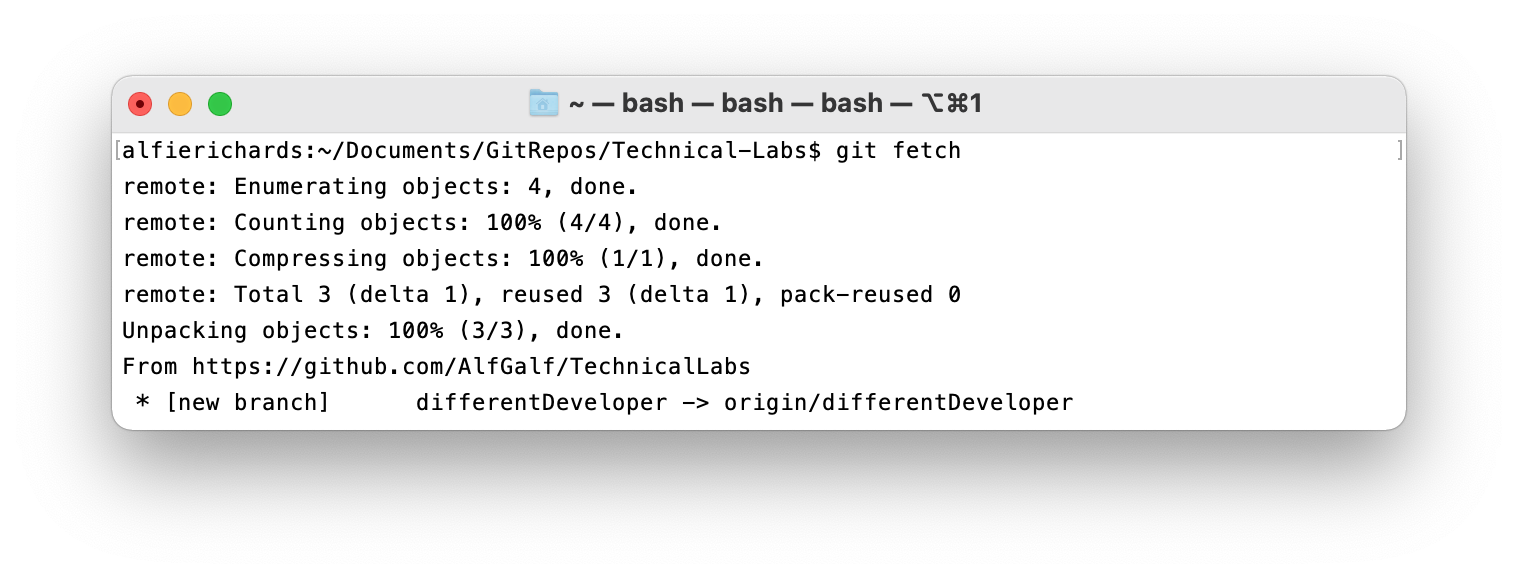
And then we can look at the remote tracking branches to see what branches there are.
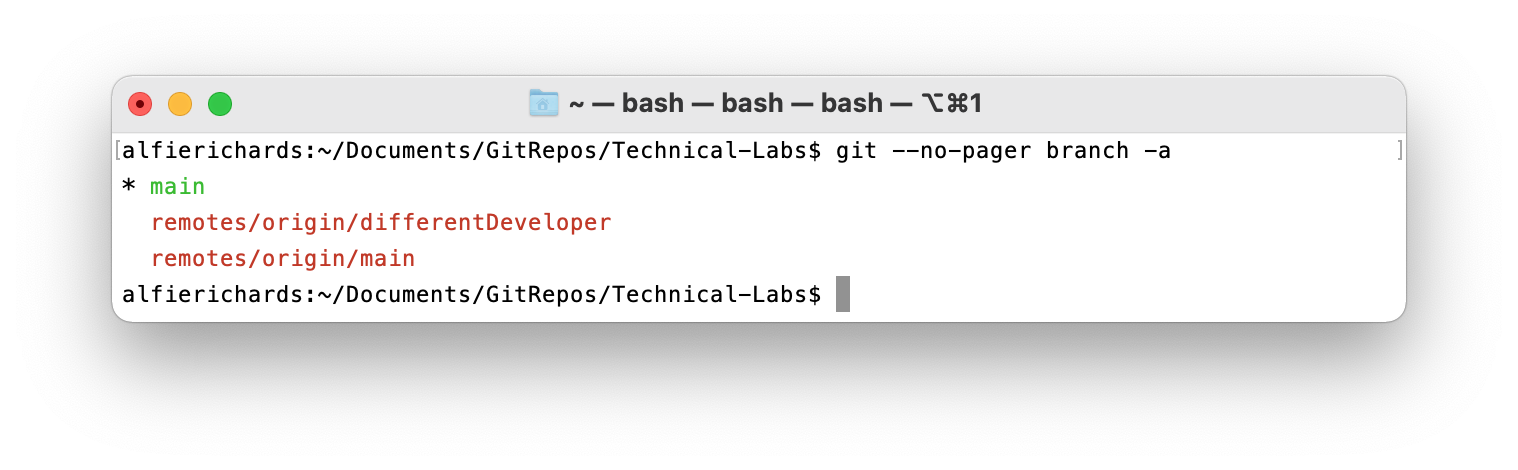
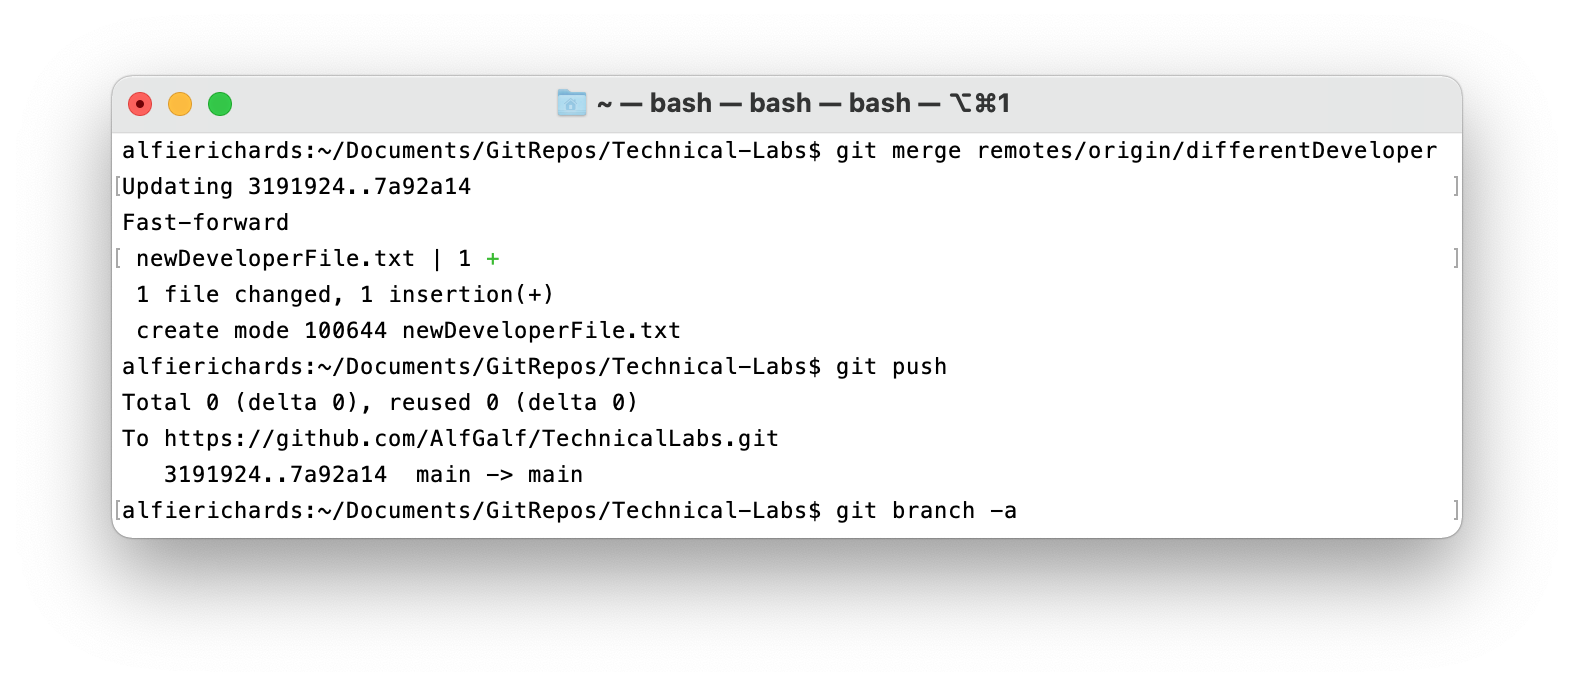
Here you can see another developer did work on the branch differentDeveloper
and then pushed that branch to the remote. In this instance I want to merge the
other developer’s changes into my main branch, then push the merged branch with
the changes to the remote.
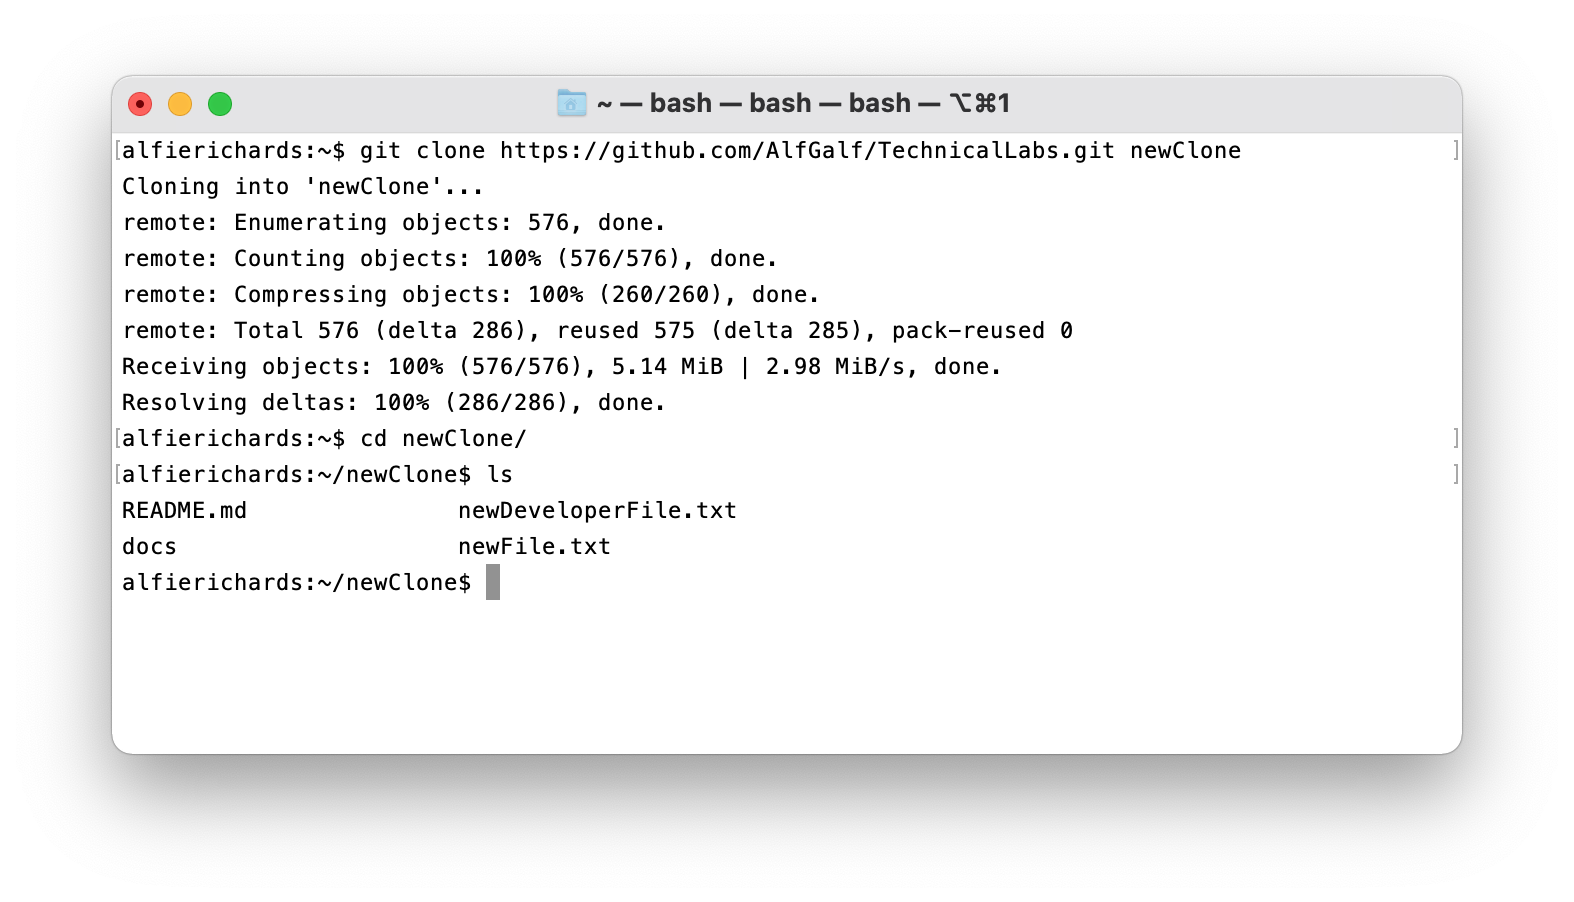
Cloning a repository
If a remote repository already exists you may want to clone that repository, to get a local copy of that repository.
To do this we will need to issue the command
git clone <git url> [directory name]. Where the Git URL is the same as before,
and the directory name is the name of the directory you want the repository to
be put into.
Here we will clone the same remote into a new local repository.
With the git clone command Git automatically adds the remote it was copied
from as the origin remote.
Collaboration best practices and techniques
Now you have seen how to make a repository, push your changes to it, and pull other people’s changes into your repo.
It’s important to run through the following in order to keep everything organised and save you headaches:
- Basic rules for using Git remotes
- Common techniques you can use in your repositories
Basic rules
- Don’t work on the same branch as other people. If you and a collaborator work on the same remote branch you will quickly start having issues. This is because one of you will push some commits, then another will try to push commits, but they will get rejected because their commits were supposed to attach to an earlier commit. Thus they must pull the changes before they can commit. This leads to them having to do a merge almost every time they want to push changes, which is tiresome.
- Don’t alter history already committed. It is possible to change commits in
your history. Some common ways are
git commit --amendto add changes to your last commit, orgit rebase, which isn’t covered in this series. However, if you do this after having pushed those changes it is possible another developer could have fetched your changes already. Then you are changing the history they have already pulled, and when they next try to push, all sorts of conflicts will happen and headaches will follow. - Don’t commit directly to the main (or master) branch. The majority of repos keep the main branch strictly for known working commits. This means you can always find a working version of the project in the main branch. If someone were to work on the main branch it is likely they would have a few commits with bugs and unfinished code, which would mean other developers wouldn’t have any version they could use if they needed to deploy a working version or check something.
Basic techniques
There are some common techniques for managing your Git repositories and keeping them organised. Here we’ll just run through a few - there are many more you’ll find people arguing about online.
Firstly, each bug fix and feature should have its own branch, and the name of
the branch should start with feat/<feature_name> and bug/<bug_name>
respectively. This allows for much easier tracking of bugs and features, stops
development happening on the same branch, and facilitates concurrent
development.
Secondly, each commit is encouraged to represent an atomic change. You should try to avoid having multiple changes within one commit.
Thirdly, it is extremely helpful for anyone glancing at the commit graph for all commits to have messages that describe the changes made within then.
Lastly, in many repositories it is encouraged that before you push to the remote you make sure your version of the codebase is in a functional state. You might want to avoid pushing half finished work.
GitFlow
Additionally there are git extensions that facilitate certain git management strategies. GitFlow is a popular example.
Resolving merges
You may have noticed we talked a lot about merges, and indeed in most Git workflows merges are common. So let’s briefly cover how to do a merge and how to resolve them.
Ideally with merges the two sets of changes will be independent from each other (i.e. not changing the same lines), and Git will be able to automatically combine them. However, this is often not the case: if the two sets of changes have edited the same lines, this will result in “merge conflicts”.
Start a merge with the command git merge <branch_name>, and if it can be
completed automatically, Git will give a success message and prompt you for a
message for the new commit merging the two branches. However, instead it will
often return a message stating the commit can’t be completed. Git will have
added “conflict markers” to the conflicting files. At this point you have two
options: either you can use the command git merge --abort to abort the commit
and return to your previous commit, or you can go into the conflicting files and
resolve the conflicts.
Conflict markers will look something like this:
<<<<<<< HEAD
The lines from the branch currently checked out
=======
The lines from the branch being merged in
>>>>>>> branch_being_merged_in
Where the lines with the >, =, and < are the conflict markers. Git is
asking you to manually merge the two sets of changes, because it couldn’t figure
out how to automatically. Whether that means just keeping one or the other of
the two blocks that are separated by markers, or manually editing them to
combine changes made in both, you should remove the markers themselves and
ensure the file is in a working state.
After removing the conflict markers you can stage the file again with
git add <file>. Once you have done this for all conflicting files just run
git commit, at which point Git will prompt you for a commit message. The merge
is now complete.
There is specialised software to make resolving git merge conflict easier. Ofter IDEs come with software preinstalled. For instance Visual Studio Code has a popular tool for resolving conflicts.
Pull requests
With GitHub in particular there is a very popular system for managing collaboration: forks and pull requests. In this system there will be a remote repository on GitHub which someone maintains.
If you wanted to make some changes to the repo, the repo owner could add you as a contributor. This allows you to submit changes directly to the repository, and isn’t always recommended. Alternatively (and more often), you will “fork” the repository, which means GitHub will make an identical repository in your account. You can then make any changes in this repository.
When you have finished your changes on your fork you can submit a “pull request”, which is a request for the main repository to pull from your forked repository. If accepted, this will add all of your changes to the main repository. The maintainers of the main repository can then look through the changes, alter them if they need, and add them in as they desire.
You can also submit a pull request to request a merge of one branch into another within the same repository.
The system of forks and pull requests is a very common workflow in Git and is how we handled getting collaborators to suggest changes to these notes.
Exercises
- Make a GitHub account.
- Add some of your local repositories to your GitHub account.
- Clone the repositories of some projects on GitHub, for instance this project or Jekyll - the tool used to build the website for these notes.
- Try collaborating using Git on your next group project! Try to use good practices and encourage others to do the same.
- Practice good Git practices while working in your private repositories. You’ll thank yourself later!
References and resources
These notes are the second of two sessions on Git. The first can be found here.
A lot of this information comes directly from this O’Reilly book which is available as part of the O’Reilly subscription all students at the University of Bath have access to.
Additionally there are some great resources for finding out more:
- This article by Microsoft explains their Git workflow.
- Another article by Microsoft explains more about Git.
- GitHub’s best practices article.
- Oh Shit, git!?! is a great resource explaining many common Git pitfalls and how to get out of them.
- Pro Git is a free book explaining a lot more of Git in much more detail, including distributed Git and Github.
Thanks
These notes were written by Alfie Richards.
Edited by Joe Cryer
With additional additions and corrections by: