Build Systems and Continuous Integration
24 November 2020
Table of Contents
Metaprogramming
As a computer scientist you will be aware of the amazing power of computers to automate tasks, making them quicker and easier. You may also be aware that a lot of development time is taken up with repetitive manual tasks. For this reason there are a whole bunch of tools that make up a category the MIT Missing semester series call “metaprogramming” - essentially, software for the purpose of writing software.
These tools may seem over the top for small projects, where setting up these tools would take far longer than the time saved from doing the tasks manually. However, as any project grows, that equation flips drastically and these tools become absolutely essential.
These tools can be loosely grouped into four categories, but there’s lots of overlap, and many tools can be in many or none of the categories. It’s an extremely broad topic. For this reason we’re going to give a brief introduction to each category and an example for each, but you will need to find and do more research on the correct tool for any project.
One reason this topic is so broad is that a lot of languages and technologies have their own suite of tools. There are then a selection of more general tools that try to encapsulate all the features of the specialised tools. This leads to a lot of competing tools and standards. For example, Wikipedia’s list of build automation tools.
Side note: Please see xkcd #927.
I’m going to break down the topics as follows:
- Build automation
- Continuous Integration and Deployment
- Dependency management
- Unit testing
We’re going to cover 1 & 2 this week, and then 3 & 4 next week.
Build automation systems
In this section, when I say “build” I mean it in the broadest sense: taking some input you’ve made and turning it into an output. Building could be compiling a large codebase into a binary, or generating a PDF from LaTeX code.
For large projects that involve a variety of technologies, building the project can involve many time consuming steps. In addition, if you want collaborators on the project, working out how to build the project could be a big hurdle to joining the project. To solve these issues, we have build automation software.
As I said earlier, there are a lot of build automation systems. Which one is best for a project depends on the technologies being used, the size of the project, and personal taste. Regardless, most build systems work off a system of dependencies, targets and rules dictating how to go from dependencies to targets.
When you tell the build system to you want to build a particular target, it will find all the transitive dependencies of that target and apply the rules to produce all the intermediate targets until the final target has been produced. However, if any of the intermediate targets have been built previously and haven’t changed, the build system will not needlessly rebuild them, which can often lead to massive time saves in large projects.
This is best shown through an example. Nice build automation examples are hard to come by as they are most applicable to large projects. I’m going to use the example from the Missing semester series.
Example
Here we will use the make
program that comes installed in most Unix-like operating systems. make is old,
and has some rough edges, but works well for small to intermediate sized
projects.
In this example we’re making a report in LaTeX. This report needs a graph produced from a set of data points. Thus, that graph is a dependency of the report target. We can also define rules for how to make the report given the graph, and how to make the graph given the set of data points.
In make you configure the project in the Makefile in the root directory.
Here is how the Makefile looks for our report:
paper.pdf: paper.tex plot-data.png
	pdflatex paper.tex

plot-data.png: data.dat plot.py
	python plot.py -i data.dat -o plot-data.png
Each item in a Makefile is a rule, which is made up first of a target,
then after the colon a space-separated list of the dependencies for this target.
Lastly the lines below the item are the commands needed to create the target
from the dependencies.
Here are how our paper.tx, plot.py, and data.dat files look:
paper.tex
\documentclass{article}
\usepackage{graphicx}
\begin{document}
\includegraphics[scale=0.65]{plot-data.png}
\end{document}
plot.py
import matplotlib
import matplotlib.pyplot as plt
import numpy as np
import argparse

parser = argparse.ArgumentParser()
parser.add_argument('-i', type=argparse.FileType('r'))
parser.add_argument('-o')
args = parser.parse_args()

data = np.loadtxt(args.i)
plt.plot(data[:, 0], data[:, 1])
plt.savefig(args.o)
data.dat
1 1
2 2
3 3
4 4
5 8
You can find the files in the project GitHub repo
When we run the make paper.pdf command for the first time it generates the
graph, and the document, as we wanted.
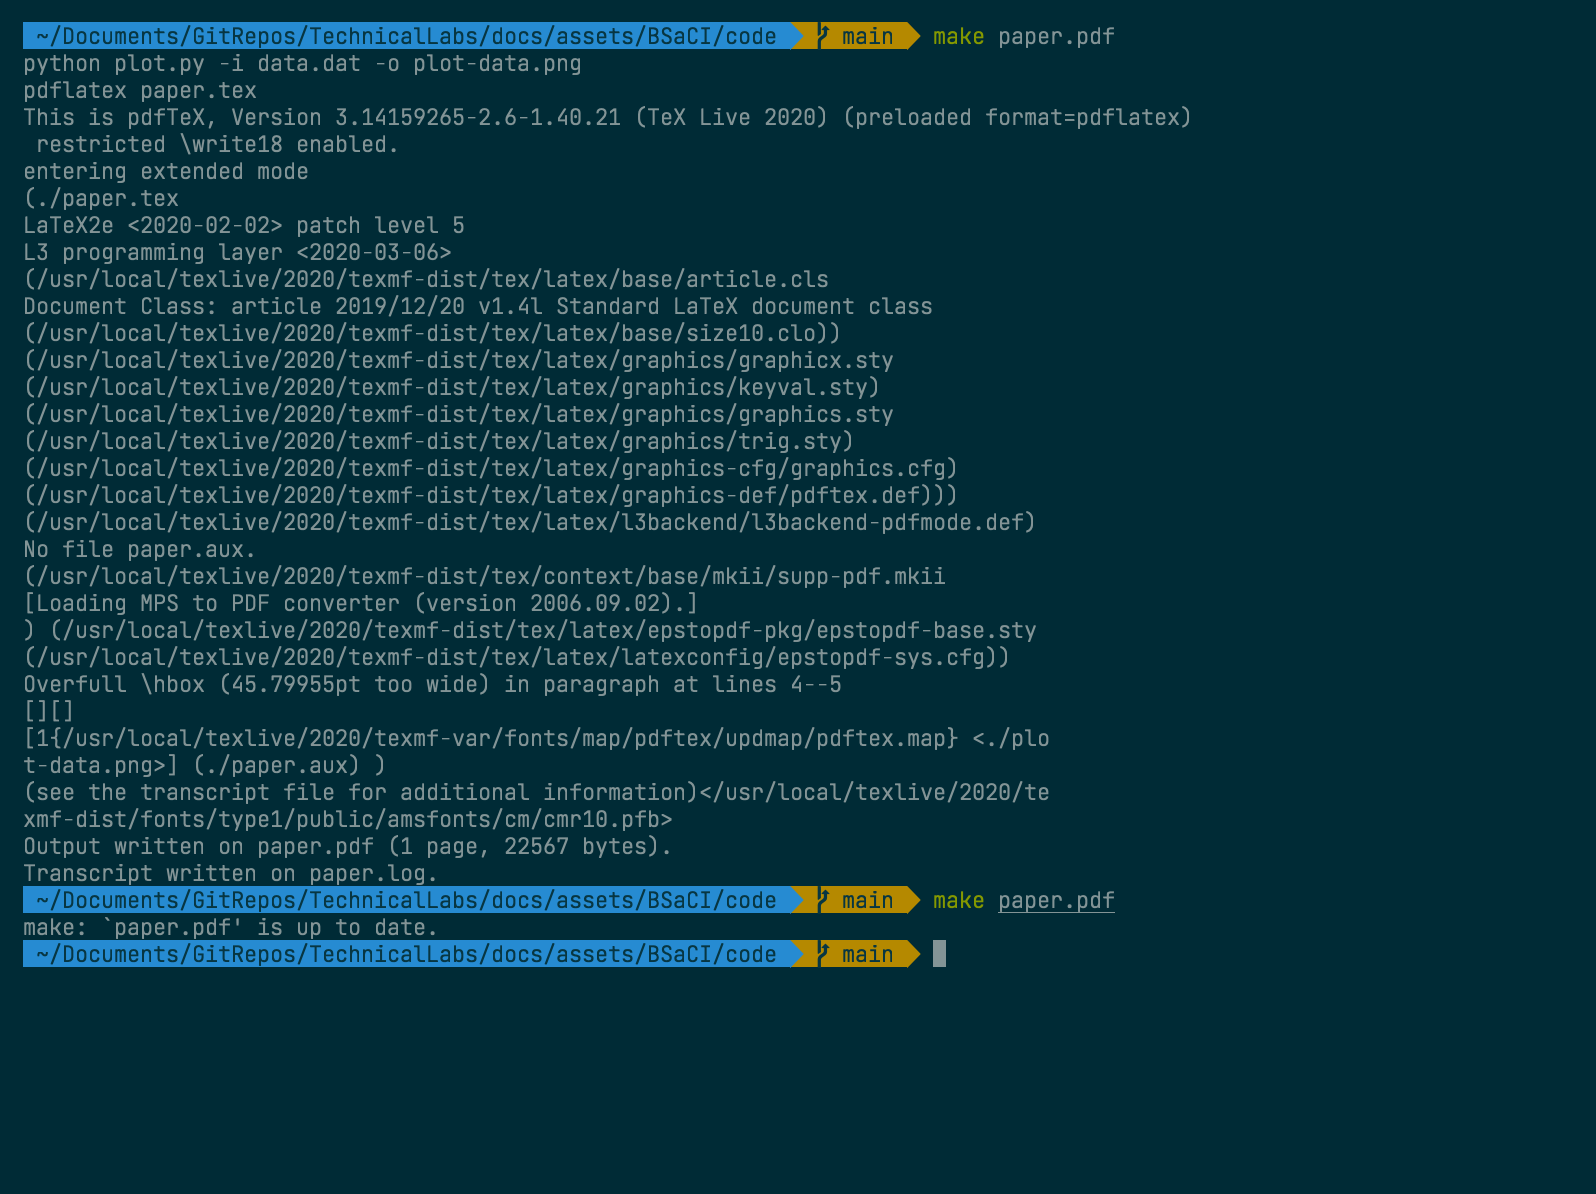
If we run make again then it will detect none of the files have changed and so
will skip all the steps.
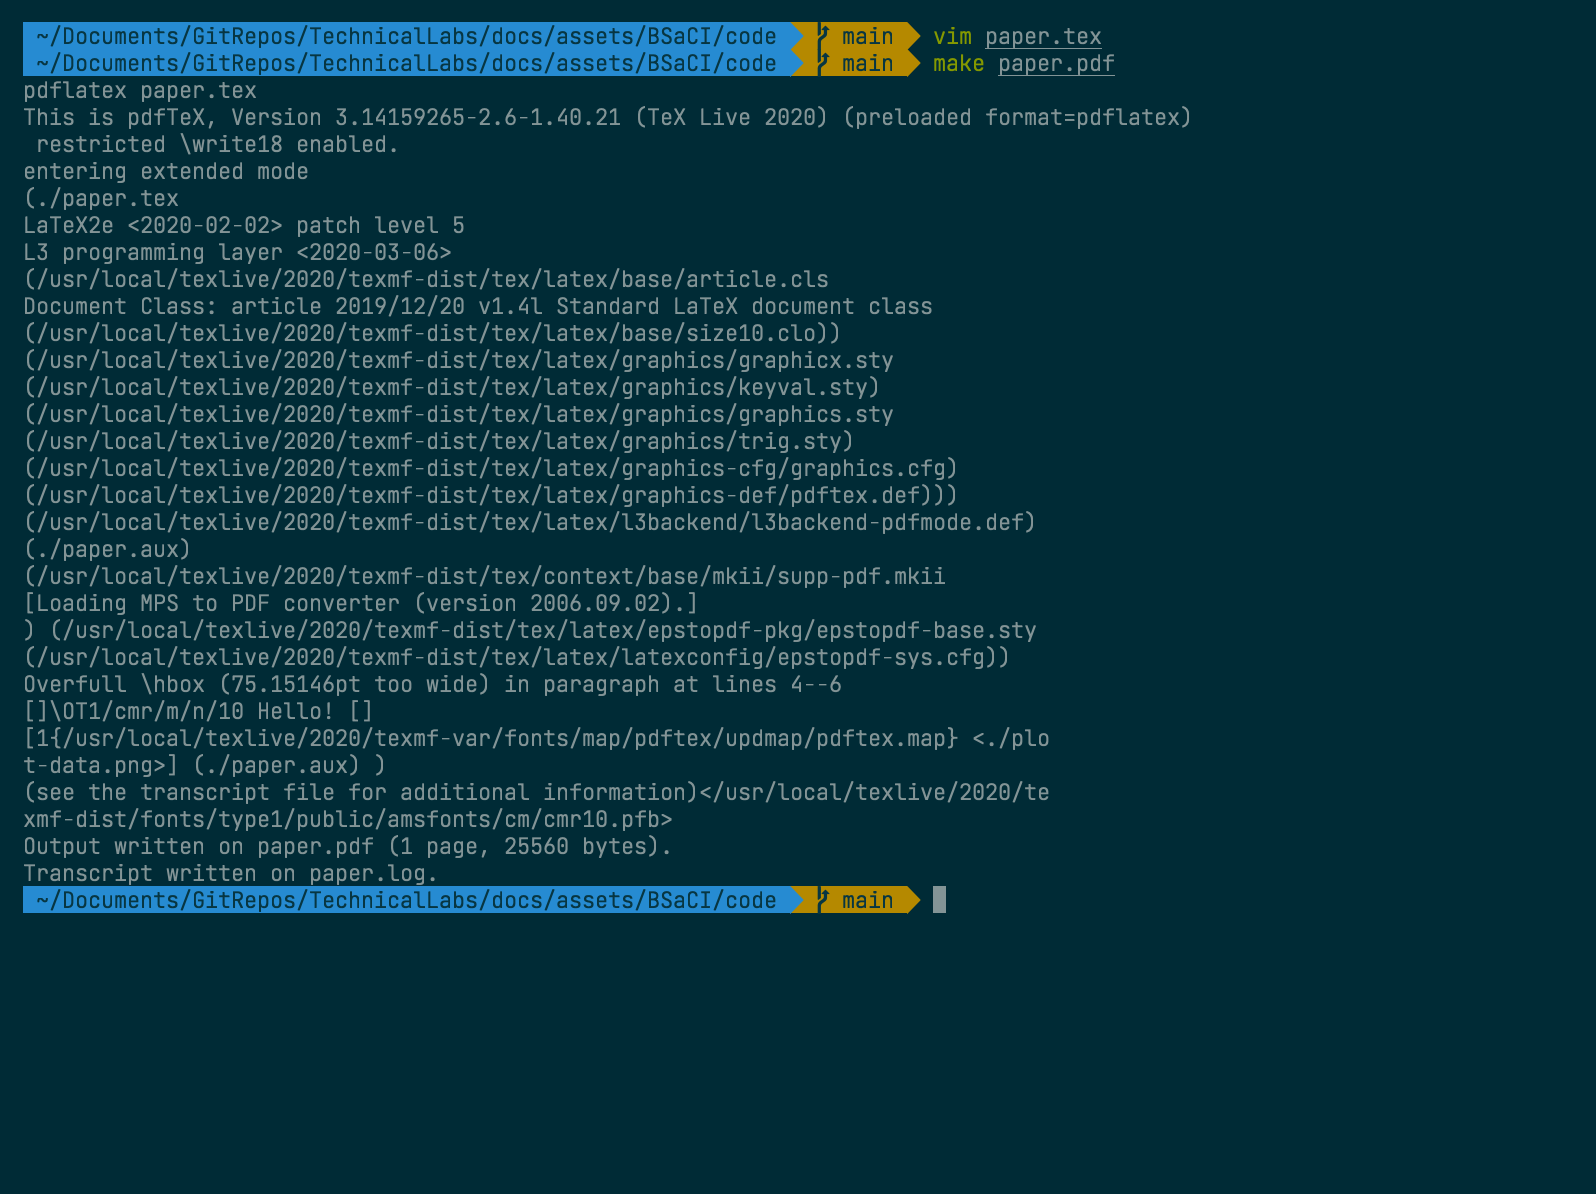
If we change paper.tex to add a title and then run the program again, we will
see that when we run make paper.pdf it will build the PDF but not the graph,
as it detects nothing has changed.
See the output PDF here.
For such a small project this doesn’t save a lot of time, but for a large project with a ton of dependencies, building every dependency each time would add up quickly. Hopefully you can see how this becomes valuable.
Continuous integration and deployment
There are a lot of tasks that a computer scientist may want to do whenever they make a change to a project. For instance, you may want to run a test suite, or if you’re updating the code for a website, you may want to update the server to host your new code.
Continuous integration (CI) is a blanket term for tasks that run when you change your project. Continuous deployment is a subset of those tasks which deploy the project.
Example
Here we’re going to look at the repository for my website www.alfierichards.com. We’ll use GitHub Actions to set it up so that when anyone pushes to the repo it will build the HTML and update the website on my server.
GitHub Actions is GitHub’s own CI tool set. It allows you to set up a series of commands and actions to perform whenever events happen in the repository. It does this by creating a small virtual machine where you can run commands.
Heres how the GitHub Actions workflow looks for my website repository.
name: Continuous Deployment

# Controls when the action will run.
on:
  # Triggers the workflow on push or pull request events but only for the main branch
  push:
    branches: [ main ]
  pull_request:
    branches: [ main ]

  # Allows you to run this workflow manually from the Actions tab
  workflow_dispatch:

jobs:

  build:

    # Run on a linux virtual machine
    runs-on: ubuntu-latest

    steps:
      # Checks-out your repository under $GITHUB_WORKSPACE, so your job can access it
      - name: Checkout
        uses: actions/checkout@v2

      # Builds the website
      - name: Jekyll Build
        uses: lemonarc/jekyll-action@1.0.0

      # Transfer the new website to the server
      - name: SCP to server
        uses: appleboy/scp-action@master
        with:
          host: $
          username: $
          key: $
          passphrase: $
          source: _site/
          target: /var/www/alfierichards.com/
This means that whenever I push or merge changes into the main branch on the GitHub repository, GitHub will open up an Ubuntu virtual machine (VM) and run the following steps:
- Checkout the repository into the VM
- Build my website using Jekyll
- Use
scpto send the new files to the server.
You can also see with the uses section that I am using actions other people have written. You can get these from the GitHub Actions marketplace. There are a lot of actions covering the majority of ways you could use CI.
I am also using GitHub Secrets, which allow you to store private information, like your server’s address and passwords without them being available on a public repository for anyone to see. This is really important - many projects have been caught out for having important security information in the codebase!
Now, instead of having to connect to the server and update the files every time
manually, which can be time consuming and discourages me from updating the
website, I instead only have to push to the GitHub repo main branch and
everything else will be done for me.
This is only an example of continuous deployment, but there are a massive variety of tasks you can automate with GitHub Actions, or with the array of similar tools.
Credit
Example taken from Missing Semester as well as
research and ideas. Other research from GitHub Docs
and GNU make manual.
Written by Alfie Richards
Editing by Joseph Cryer.
Thanks to:
For additional help
Please send any corrections here.